Office 365's new Ink feature works with the Apple Pencil so you can make quick markups on an iPad Pro. Learn how to get the most out of this handy feature.
Microsoft unveiled the newest version of Office 365 a few months ago, and tucked inside was a new Ink feature that lets iPad Pro users utilize the Apple Pencil to mark up documents, presentations, and spreadsheets with ease. To use this feature, it requires the $99 Apple Pencil accessory and a compatible iPad Pro (currently in two sizes: the 9.7″ and 12.9″). We’ll show you how to use this new feature on your iPad.
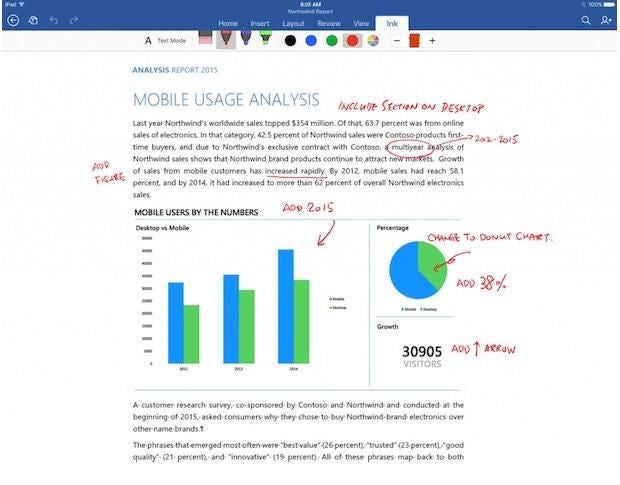
Figure A

To keep your finger or hand from pressing the screen and causing accidental marks, disable the option to Draw With Touch when using the Apple Pencil.
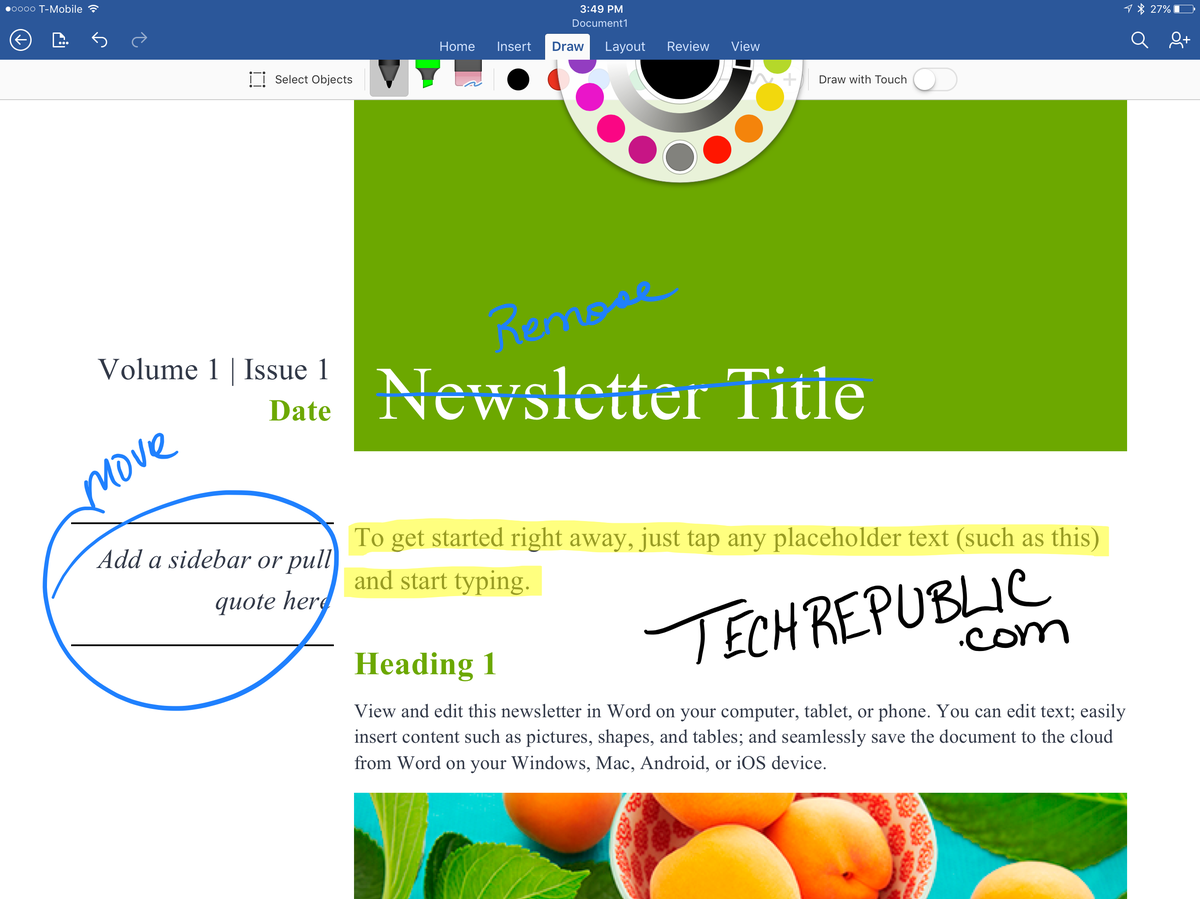
Also in the Draw tab, you can select the color using either the standard presets of black, red, blue, or green, or for something more custom, select the color wheel (Figure B). You can increase the line thickness of the drawn portion by tapping the + or – buttons for line thickness. Changing the color or thickness will only alter new items drawn on the screen, and not previously drawn items.
Figure B
Erasing is as easy as drawing in the Office apps. To erase a drawn line or highlight, follow these steps.
This will remove any pen markings or highlights in the document. Tapping a single line will erase the entire line, removing the need to erase the entire line by drawing over top of it.
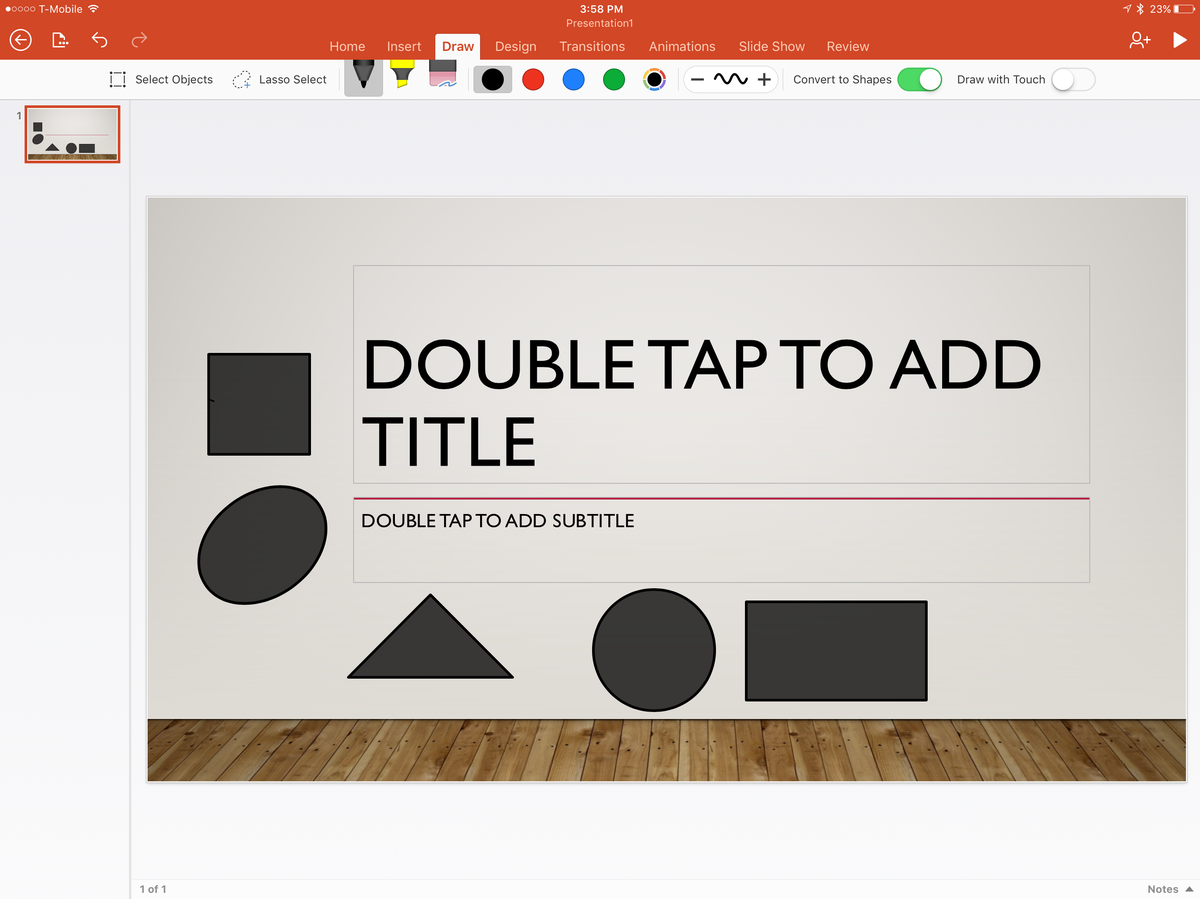
Shape recognition is baked right into Microsoft PowerPoint for iPad. It’s used to easily create perfect shape renderings when using the Ink feature.
To use this feature, select the pen function, select the color and line thickness, and then trace a circle, oval, square, rectangle, or triangle on the screen with the Apple Pencil. Ensure that the option to Convert To Shapes is selected (Figure C). After a moment, the Office app will convert the roughly-drawn shape into a perfect rendering of the shape you were intending to draw.
Figure C
Catch up on the latest tech innovations that are changing the world, including IoT, 5G, the latest about phones, security, smart cities, AI, robotics, and more. Delivered Tuesdays and Fridays
Catch up on the latest tech innovations that are changing the world, including IoT, 5G, the latest about phones, security, smart cities, AI, robotics, and more. Delivered Tuesdays and Fridays
Share ArticleCory Bohon is an indie developer specializing in iOS and OS X development. He runs a software company called Cocoa App and is also a developer at MartianCraft. He was introduced to technology at an early age and has been writing about his favorite technology part-time since 2007. He runs a development blog named ObjDev when he isn’t writing about consumer tech.